Prepare your digital signature
To use this feature you need a digital signature with a transparent background. If your signature file sits on a block colour background, such as white, this will be visible to the eye as our papers are not pure white.
For best results we recommend uploading an .svg file as these can scale without a loss in resolution. However, you can also use a .png file. If using a .png ensure the file is minimum 200dpi with appropriate size dimensions. Convert your .png files to .svg using this tool. If you don’t have a png you can use this tool to remove the background from an image file and save as png.
If you don’t already have a digital signature, there are loads of free tools online you can access with a Google search. However, if you are an Apple iPhone or iPad user, the easiest way is to use the draw function in your Notes app then export the .png file.
Upload your signature
Once you have your digital signature in .svg format, upload it to your creativehub account. Here’s how:
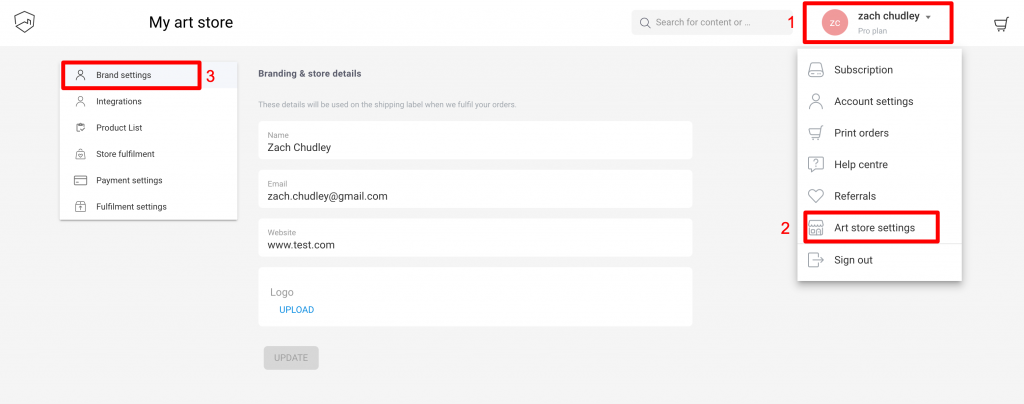
- Click on your name/profile icon in the top right corner of the creativehub homepage
- Select ‘Art store settings’ from the drop down
- You will be taken to the ‘My Art Store’ page. Select ‘Brand settings’ from the left-hand side menu
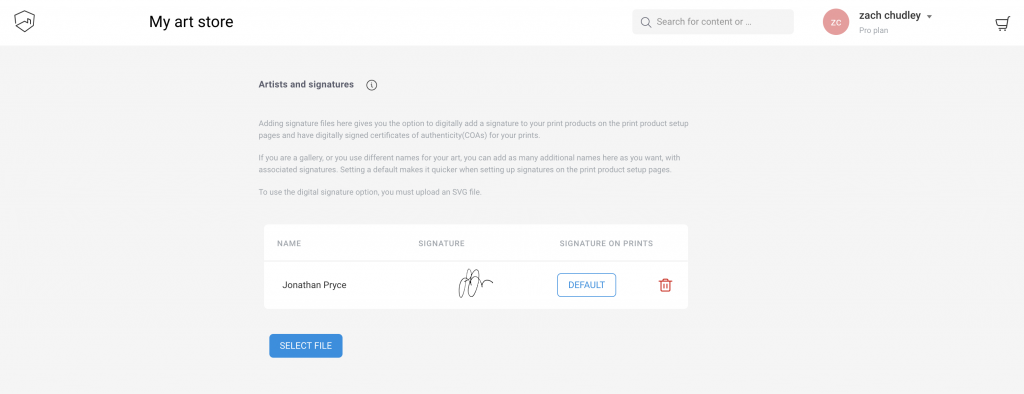
- Scroll down the page until you see the ‘Artists and signatures’ section.
- Upload your signature and save your artist name
Add signature to print (limited editions)
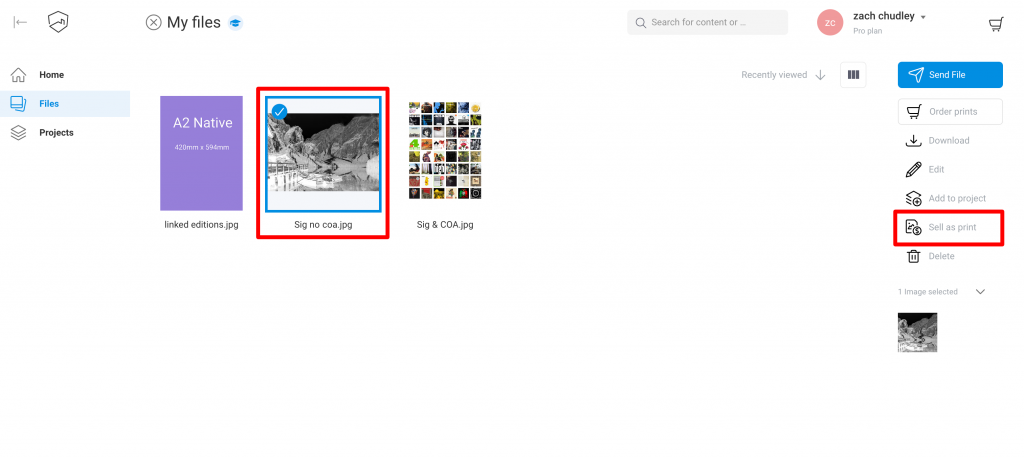
Now you’re ready to position the signature on your print. To do this you first need to create or edit an existing product variant by selecting an image in your creativehub account, and clicking sell as print.
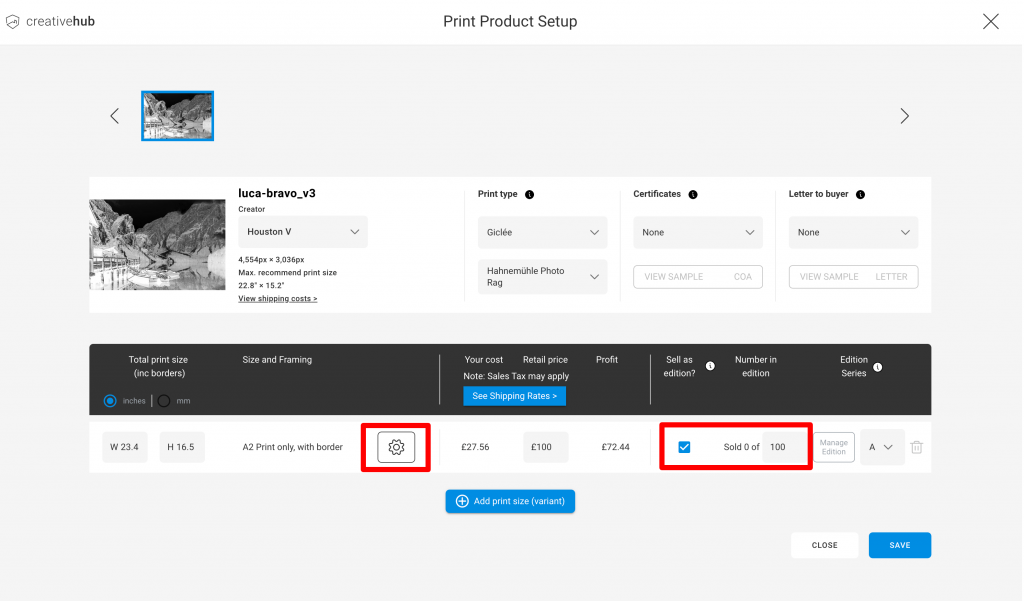
Now you are on screen where you create print products, ready for sale in your store. You add sizes by clicking ‘add print size’. When you click add print you can select the size of print you want to sell, whether you want a border or a frame.
Next, activate the ‘sell as edition’ option and save your edition size. Then click the edit button highlighted in the below screenshot.
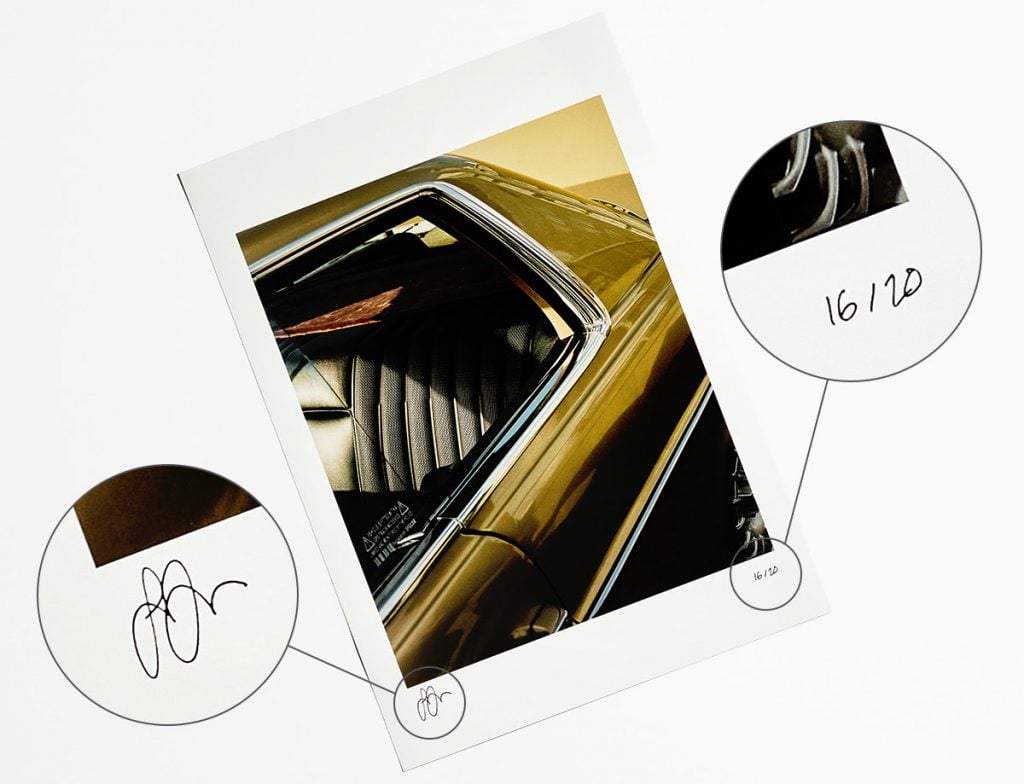
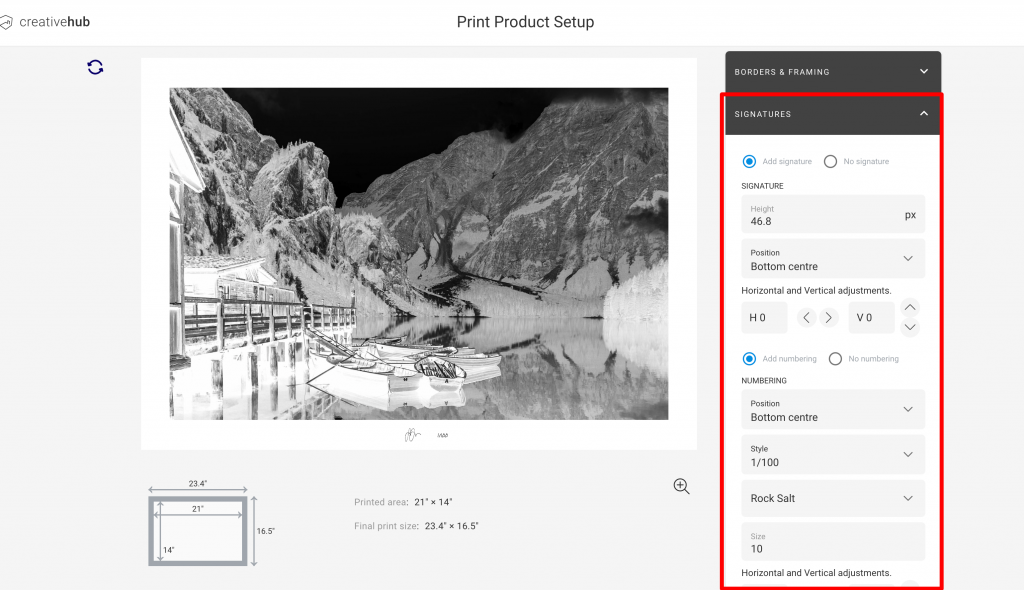
Expand the ‘Signatures’ panel from the right hand side menu and apply your signature and edition number settings. Note that edition numbers are options.
Add signature to print (open editions)
If your product variant is not being sold as a limited edition, i.e an open edition, then you can still use the signature on print feature.
To do this, once you have setup a print product, click the edit button highlighted in the below screenshot.
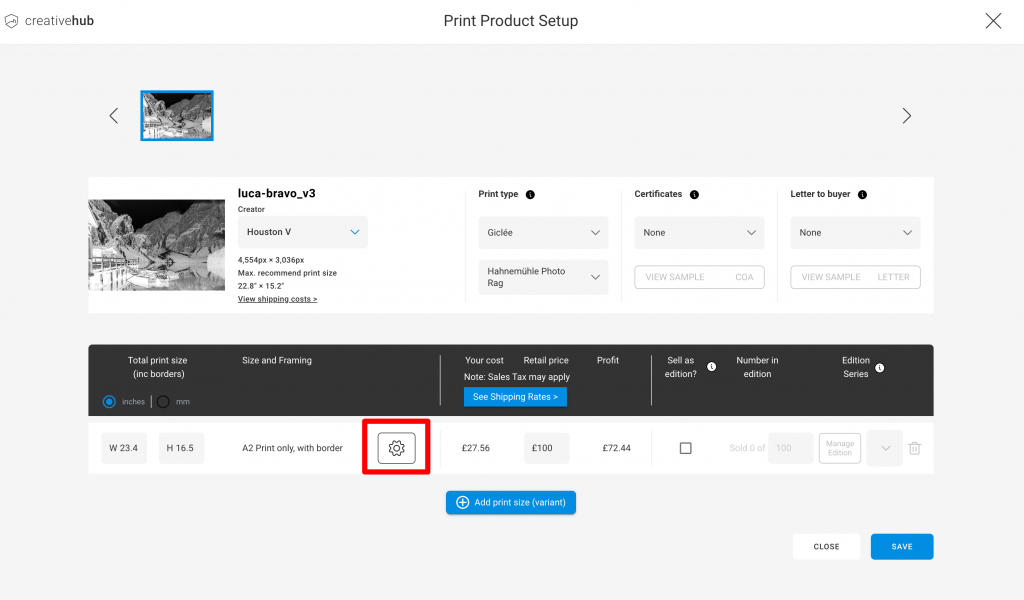
Expand the ‘Signatures’ panel from the right hand side menu and apply your signature settings. Note that edition number options is unavailable as the product is an open edition.
