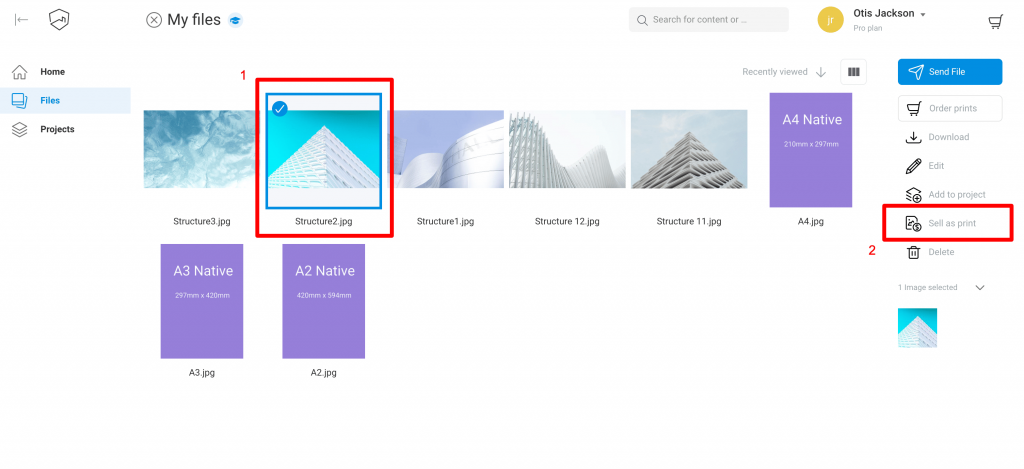
To sell framed art prints on your website, first you must create a product by selecting an image in your creativehub account, and clicking ‘sell as print’.
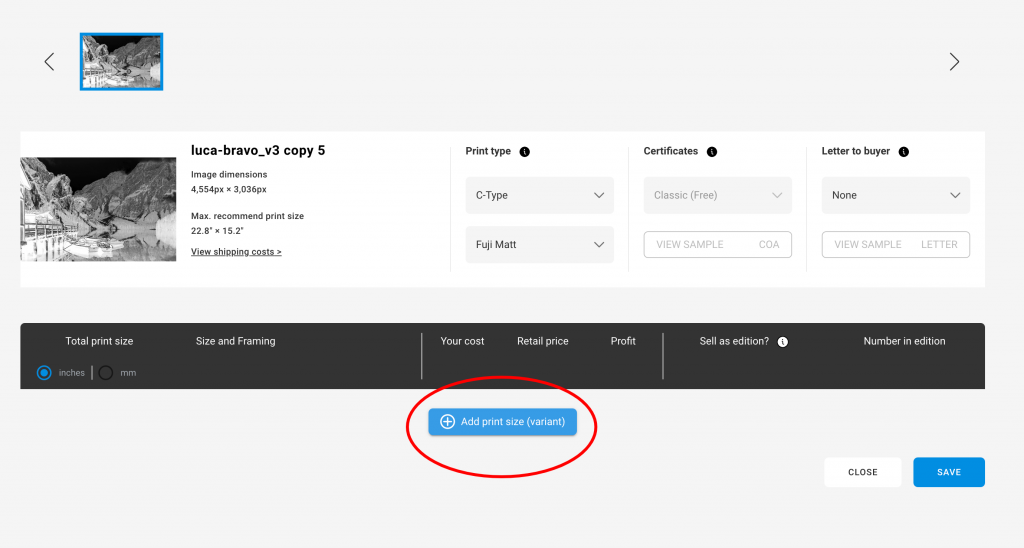
Now you are on the screen where you create print products. We’ll come back to the options on this page, but for now click the button ‘Add print size’.
You are now on the screen where you set your print size and/or frame:
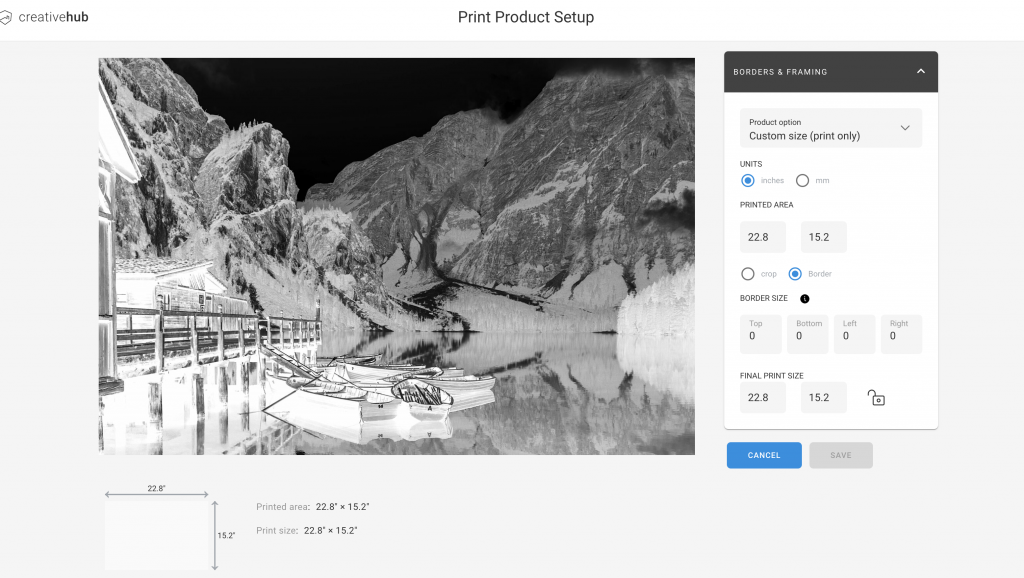
Use the drop down to make your print size selection:
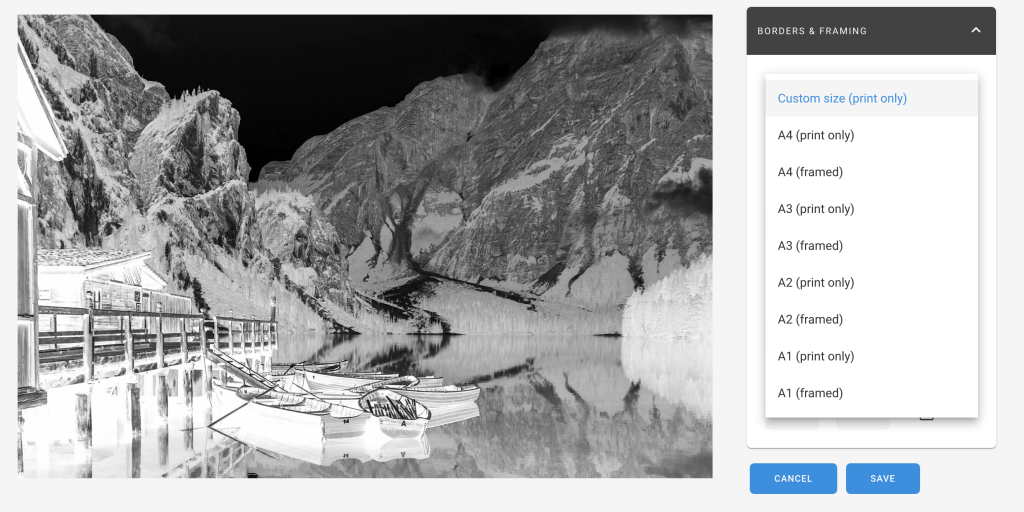
‘Custom size (print only)’ will leave your native aspect ratio with the option of adding a border to the file. The frames used for dropshipping are A size & Square so we have these sizes setup for you. First select your size, then frame moulding (colour) then whether you would like to crop, add a printed border or window mount. Use the toggles to adjust your sizes.
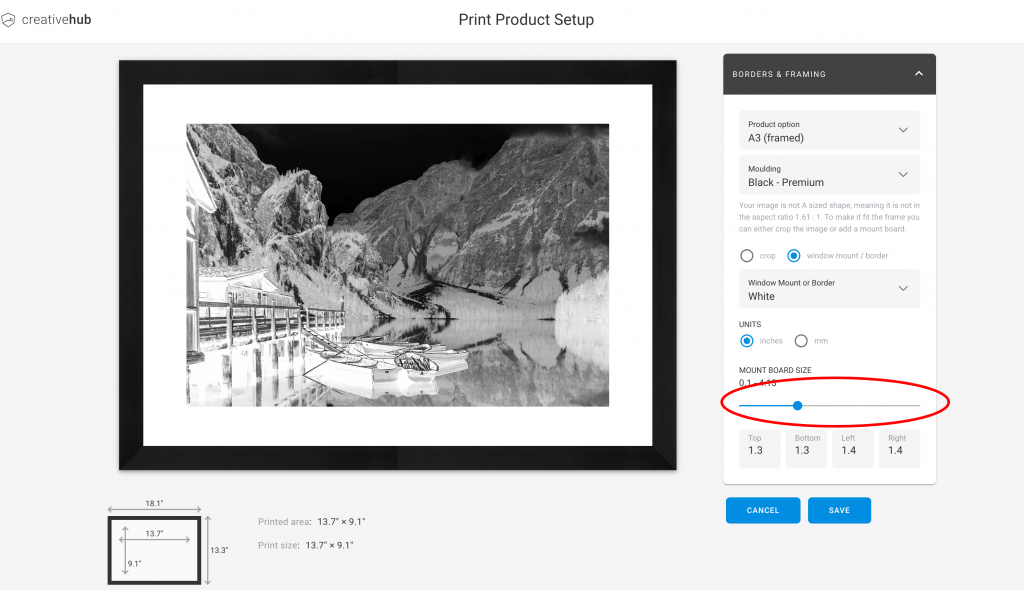
When you are done, click ‘save’
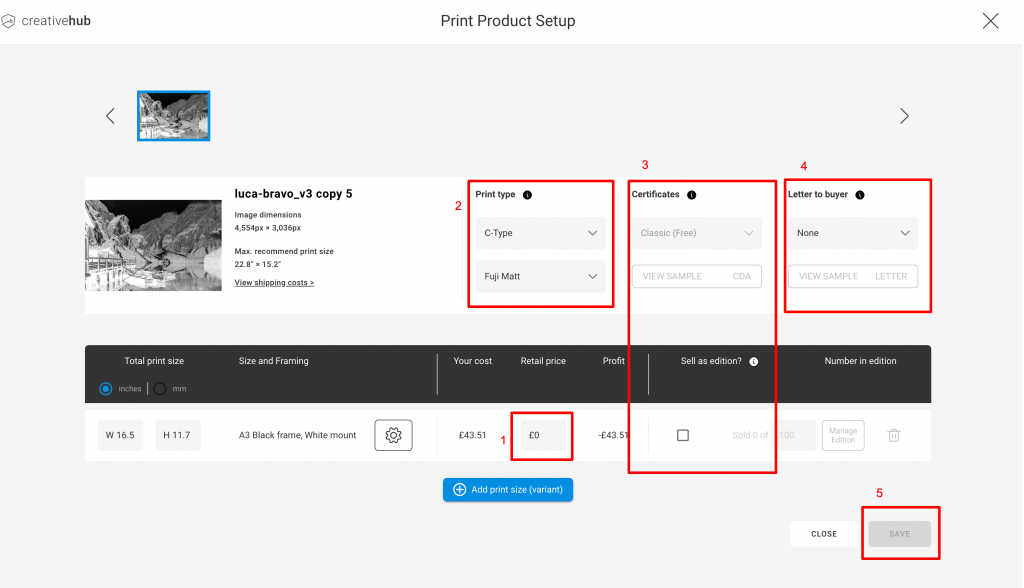
Now you are back on the product set up page. You will see that your ‘print size’ and ‘costs’ have been pre-filled according to your print & frame settings. Next, complete your product details:
- Add your price
- Choose your paper type
- Set up limited editions & choose your certificate (this is optional)
- Choose your custom insert (this is optional)
- Click ‘save’ to complete the process
You are now ready to import your products to your store.

